
Blueprint Exchange Guides
Everything you need to capture, share, download and import BPX layouts.
Download & Import Blueprints
The game can’t look inside its own folder, so a download only shows up after you move it there and press one button.
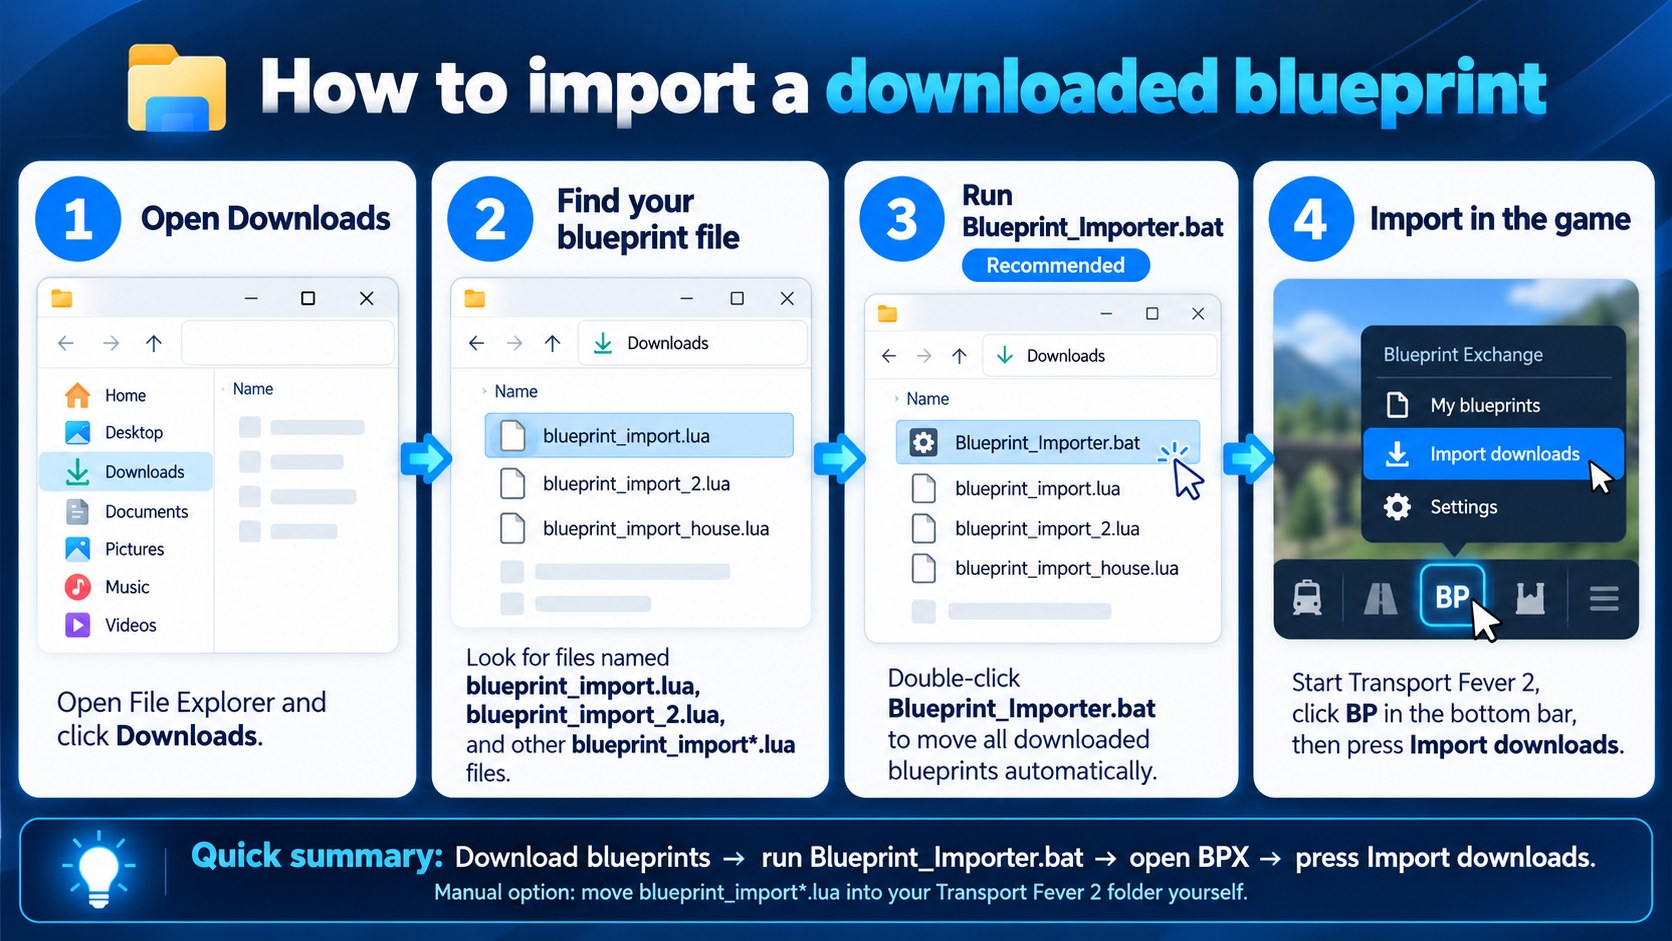
- Download as many blueprints as you like from the library, up to 10 at a time.
- The files land in your Downloads folder named
blueprint_import.lua,blueprint_import_2.lua,blueprint_import_3.luaand so on — each download gets the next name. - Move them into the Transport Fever 2 folder (the one with
TransportFever2.exe), or let a Blueprint Importer do the moving for you. - Start Transport Fever 2.
- Click the BPX icon in the bottom bar.
- Press Import downloads. One press brings in every blueprint you moved. Then choose one in the Library and press Place.
Capture Your Own Blueprint
Build it once, capture it, and place it on any map — yours or someone else’s.
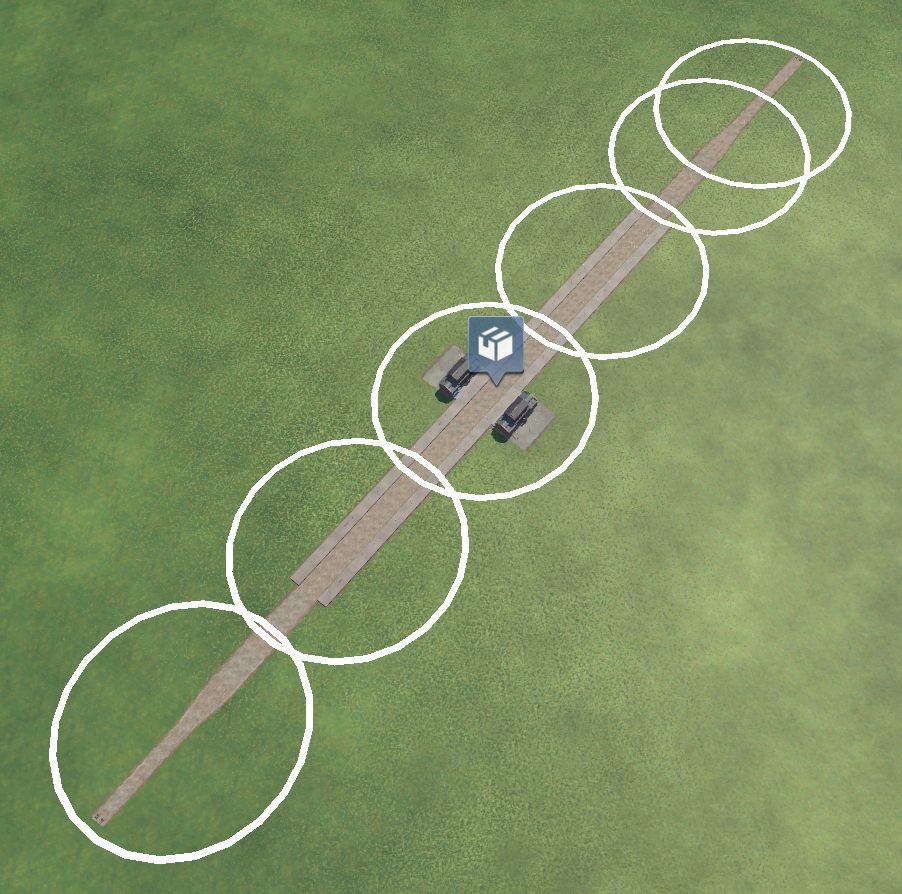
- Build your layout in a sandbox game. Flat ground is best — use the terrain tool to level a patch first, and your blueprint will place cleanly anywhere. (The map editor has no rails, so build in a game.)
- Click the BPX icon in the bottom bar and open the Capture a design tab.
- Type a name in the box. The mod will not start a capture without one.
- Press Capture, then click on the map. Every click adds a circle and the status line counts what it found. Keep clicking until every building, track and signal is inside a circle. The Circle size slider makes the circle bigger or smaller.
- Press Save. Your blueprint is written as a file and appears in your library.
Check it before you share it
- Press Place and move the mouse over the map: a blue shadow of the whole layout follows the cursor. Turn it with the slider or the -90 and +90 buttons, then click to build a test copy.
- Look it over. Missed a bit? Press Undo & capture again, which removes the test copy, then capture again under the same name with a wider chain of circles.
- Happy with it? Press Keep blueprint. Changed your mind about where you put it later? Undo last blueprint placement removes everything the last placement built.
Where is the file? Your blueprint is saved as blueprint_<name>.lua in the Transport Fever 2 folder, right next to TransportFever2.exe. That is the file you upload.
If the game refuses a spot, the status line says why in the game’s own words (“Collision”, “Too much slope”) and nothing is built. Try flatter, clearer ground, or turn the layout — a long one needs room along its whole length.
What gets captured
Player-built constructions (stations, depots, assets) with their names, free-laid track and roads with their switches, bridges and tunnels, and signals. Industries and town buildings are never captured — the game can’t rebuild those.
Find Your Transport Fever 2 Folder
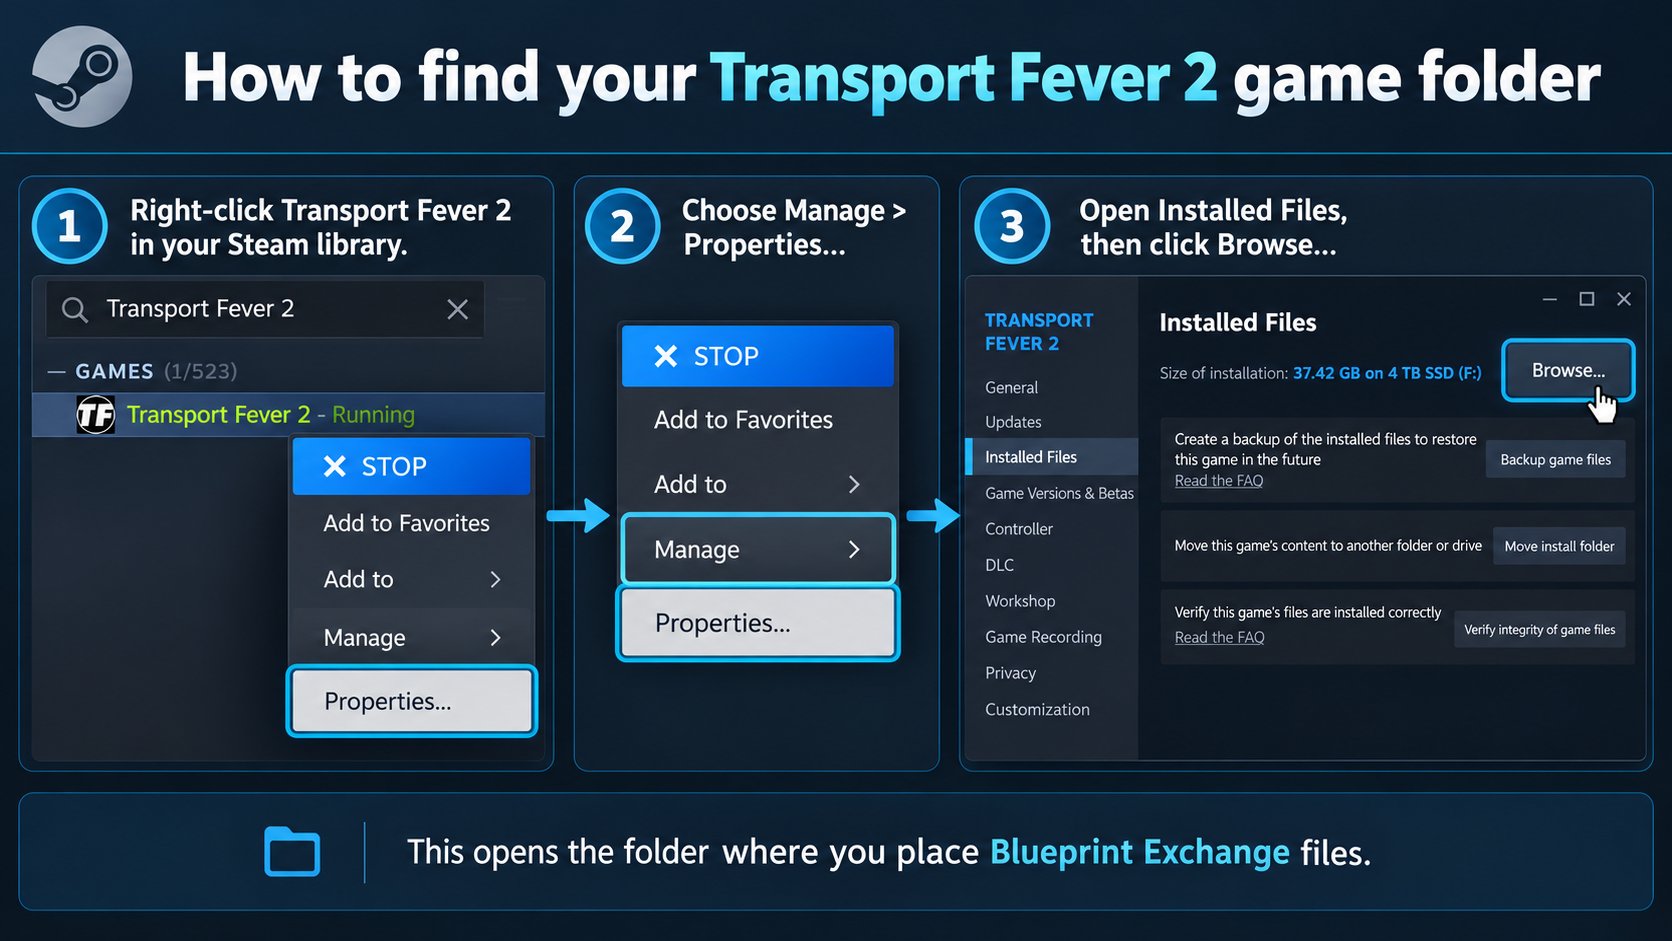
- Open Steam and find Transport Fever 2 in your Library.
- Right-click it, choose Manage, then Browse local files. (The Properties → Installed Files → Browse button gets you to the same place.)
- A folder opens. That is your Transport Fever 2 folder — you will see
TransportFever2.exein it.
The usual path is:
C:\Program Files (x86)\Steam\steamapps\common\Transport Fever 2
If your Steam library is on another drive, it looks more like D:\SteamLibrary\steamapps\common\Transport Fever 2. Use “Browse local files” and you never have to guess.
Dependencies
A dependency is something a blueprint needs that isn’t part of the base game — for example a station or signal that comes from a Workshop mod. If your layout uses mod content, its blueprint depends on that mod.
- Every blueprint records the content it uses: constructions, track and road types, bridges, tunnels and signal models.
- Cards in the library list the construction files a blueprint needs, under “needs:”. Blueprints that only use base game content list nothing.
- When you press Place, BPX checks each item against what is installed before it builds anything. If something is missing you get a message naming it, and nothing is built.
To use a blueprint that needs a mod you don’t have, subscribe to that mod on the Steam Workshop, load your game with it enabled, and try again. BPX never guesses or swaps in a substitute.
Troubleshooting
The Import downloads button sees nothing
The files must be in the Transport Fever 2 folder itself — the one with TransportFever2.exe — not a subfolder and not Downloads. The names must be exact: blueprint_import.lua, blueprint_import_2.lua and so on up to _10.
A name like blueprint_import (1).lua is not recognised — rename it to remove the (1). You don’t need to restart the game: put the files in, then press Import downloads again.
I downloaded more than one blueprint
That’s fine. Each download gets its own numbered name, up to 10 at a time; the counter on the library page tells you how many are waiting. Move them all into the game folder, then press Import downloads once and they all come in together.
At 10 the site pauses further downloads so it can’t overwrite a file you haven’t imported. Move the files in, then press “I’ve moved them — reset downloads”.
Where did my file go?
Downloads go to wherever your browser saves files — usually your Downloads folder. Your browser’s Settings → Downloads shows where.
After a successful import the mod saves the blueprint under its own name as blueprint_<name>.lua in the game folder and empties the import file. A tiny import file afterwards is normal.
Windows saved my .bat as .txt
In Notepad’s Save As box set Save as type to All Files and type the full name Blueprint_Importer.bat. Already saved as .txt? Turn on View → Show → File name extensions in File Explorer and rename it. Or use Download My Blueprint Importer on the Tools page for the file directly.
The blueprint uses a mod I don’t have
BPX refuses to place it, tells you which content is missing, and builds nothing. Install the mod that provides it, enable it in your game, and try again. See Dependencies.
My imported layout looks different
Place it on flat, clear ground. A blueprint captured on almost level ground is flattened so it fits anywhere; one with deliberate slopes, bridges or tunnels keeps its heights, so it needs ground that suits it. If the game refuses a spot it says why and builds nothing.
Not right after placing? Undo last blueprint placement takes back everything that placement built. If a layout doesn’t capture or rebuild correctly, that’s useful to know — BPX is a public beta and unusual layouts are exactly what it needs testing on.